Rcrussell wallpaper tutorial
Here is the tutorial that some have asked for on how to make the background that I posted here:
http://www.macheist.com/forums/viewtopic.php?id=13356
That post has now been updated and larger sizes are now available at the bottom of the first post. The picture is just for display so people can see what it looks like.
Also, I used Adobe Photoshop to make the background but I'm sure there are other programs that can do it.
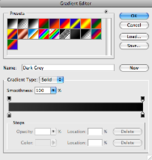
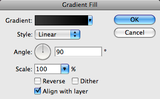
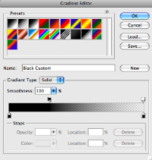
1) Make a new document the is the size of your screen (i.e. 1440 x 900 for 15" Macbook Pro). Add a linear Gradient Adjustment Layer with a linear gradient going from dark grey (#464646) from the bottom to black (#000000) at the top.

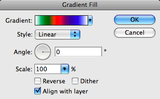
2) Make another linear Gradient Adjustment Layer above the previous one and make it a rainbow of colors of your choice. Make the sure angle of the gradient is 0 degrees. Set this layer's Fill down to 25%. Then set the layer's Blending Mode to Color.
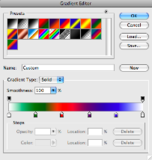
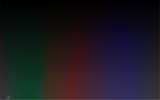
Note: I used the MacHeist team colors for the color gradient.
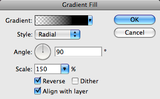
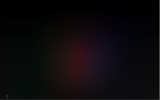
3) Make a radial Gradient Adjustment Layer above the previous two. Make the only two colors black from 0% to 30% and then a black to transparent gradient until the end. Check the reverse box and set the layer Opacity to 65% with the Scale at 150%.
4) Hit the T button for the type tool a single click on the canvas around where you want the letter o go. Type the letter of your choice, make it black, and adjust it to the size you want. Then set the layer's Blending Mode to Screen. The letter will disappear but this is fine.
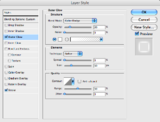
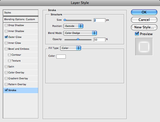
5) Double click to the right of the letter layer's name in the layer palette to bring up the layer styles palette. Set the Outer Glow and Stroke settings as shown below.

6) Once the settings of the font are the way you like them, duplicate the layer by dragging it down to the New Layer button at the bottom of the layer palette. Select the type tool again (T) and change the font of the new layer. Make sure the bottoms of the letter line up by using Free Transform (CMD+T). Most fonts will not need an adjustment but some may. Repeat this step around 20 times, each time using a different font.

7) Select all the layers you have by holding down shift while selecting them and hit CMD+G to group them together. Name this group the letter you made for organization purposes. With the group selected in the layer palette, hit V for the move tool. Hold Alt and click and drag on the letters on the canvas to duplicate them. Drag them to the right where you want the next letter to be. Then go through each layer of the new group, changing the old letter into the new letter that you would like. Repeat this step for all desired letters.
8) Select the Elliptical Marquee tool and make a thin ellipse at the base of the letters. Change the Feather of the marquee to 20%. Then go into Quickmask Mode by typing Q and go to Filter, Blur, Motion Blur. Make the Angle = 0 and the Distance= 700px and click OK. Then exit Quickmask Mode by typing Q again.
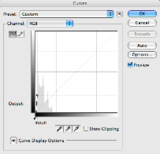
9) Make a Curves Adjustment Layer above the gradients but below the letter groups. Then apply a curve that looks something like the one below, or until you are satisfied with the effect.
10) Take all the letter groups and group them together using CMD+G. Then drag this group down to the New Layer button at the bottom of the layer palette. With the duplicate layer selected, hit CMD+T and Right Click on the layer in the canvas and select Transform and then Flip Vertical. Then move the layer down so they look like a reflection. Set the layer's opacity to 25%.
The final product:

Note: If you change the Angle to 90 degrees in 2) above, and make the letters large, this also gives a good effect but I chose to use 0 degrees and smaller letters to achieve the effect I wanted to.
I hope you enjoyed this tutorial and let me know if you have any questions.
Thanks!
Rcrussell


Friday, April 19, 2024
Tutorials
- Tutorials Start
- Forum Use by Wasgo
- →Wallpaper Creation by rcrussell
- Animated Avatar by jennsbl